Every photographer, whether a novice or a professional, benefits from having software that will organize photos and have all the right editing tools.
In our tutorial for beginners, we will tell you everything you need to know about Lightroom 6, so that you can decide if it’s the best software for your photos.
What Is Lightroom 6?
Photoshop Lightroom is photography software from Adobe and has three primary functions for users: sort, post-process, and export photos. While there are a variety of features which may interest and benefit advanced users, we focus our tutorial for beginners or first-time users of Lightroom.
Whether you’re a novice photographer or a budding professional, you’re most likely looking for software that will allow you to upload, sort, edit, and export all of your photos to your desired size specifications. Lightroom 6 is often also known as Lightroom CC; Lightroom Classic CC is for desktop use and Lightroom CC is a cloud-based service.
Checking Your Compatibility For Lightroom 6

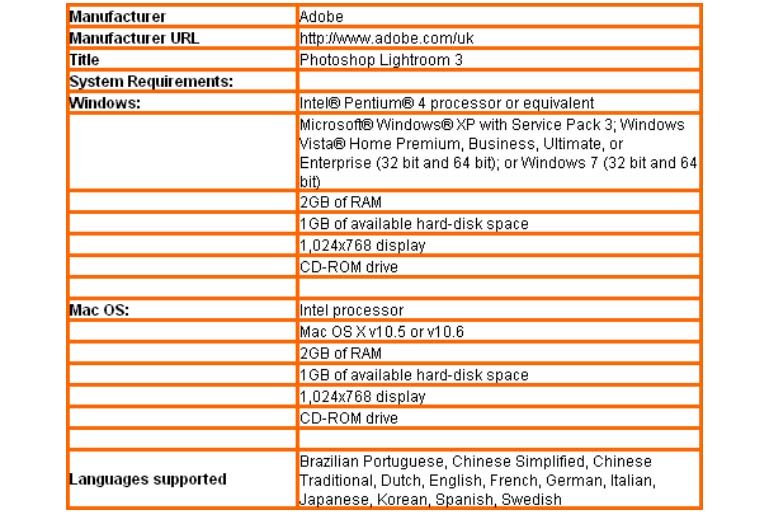
Before you purchase Lightroom (which is less than $10 a month), it’s important to make sure that you have a compatible system. Internet connection and registration are required for software activation, validations of Lightroom subscriptions, and access to any of the online services provided through Adobe. Here’s what you need for Lightroom Classic CC (desktop version):
 5 Stars |
Adobe Photoshop Lightroom 6
|
For Windows
- Intel or AMD processor with 64-bit support
- Windows 7, Windows 8.1, or Windows 10 (1511 or later)
- 12 GB is preferred (at least 4 GB is required)
- 1024 x 768 display
- At least 2 GB of hard-disk space
For graphics processor acceleration (for Windows) you should have:
- AMD: Radeon GPU with DirectX 12 or OpenGL 3.3 support
- Intel: Skylake or a newer GPU with DirectX 12 support
- NVIDIA: GPU with DirectX 12 or OpenGL 3.3 support
- OpenGL 3.3 and DirectX 10-capable video adapter
For macOS
- Multicore Intel processor with 64-bit support
- Mac OS El Capitan, Sierra, or High Sierra
- 12 GB is preferred (at least 4 GB is required)
- 1024 x 768 display
- At least 2 GB of hard-disk space
For graphics processor acceleration (for macOS) you should have:
- AMD: macOS 10.12 with Metal support
- Intel: macOS 10.12 with Metal support
- NVIDIA: macOS 10.12 with Metal support
- OpenGL 3.3 video adapter
For more information on compatibility, visit Lightroom System Requirements.
Beginner Steps When Using Lightroom 6

As you use Lightroom more frequently, you may have more questions on how to use specific features. The Adobe site is a great place for in-depth tips and tutorials; here are some of the most basic steps you need to get started once you install Lightroom into your desktop computer.
For more information on the cloud-based version (and to see if there are differences), check out the Adobe website.
Organizing
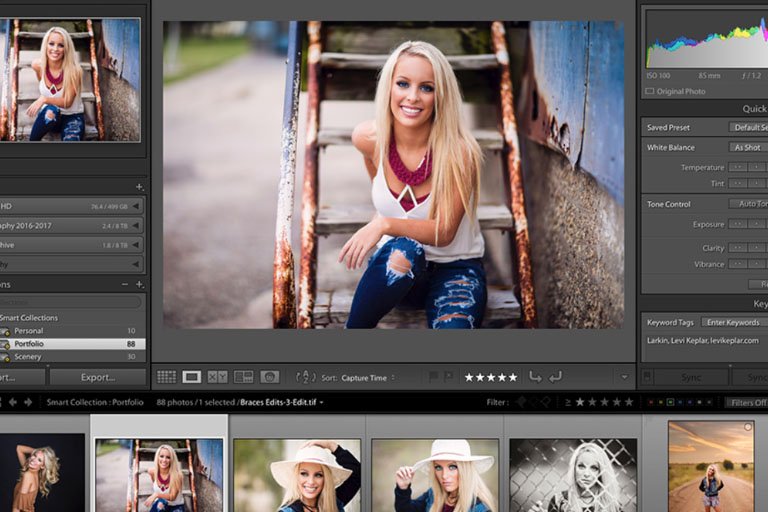
Once you upload your photos into your computer, one of the first steps you’ll want to do is organize your photos. Only the photos you upload after you install Lightroom 6 will automatically show up when you use the software, but you can also import existing photos into Lightroom.
When you upload new photos into your computer, they are automatically put in a file system (typically by date). From there you can create and edit folders and even star some of your favorites with a five-star rating system to make them more organized and easy to find.
Have a new photography project or what to categorize your photos by subject? You can easily organize them by editing and creating folders. Here’s how you import the photos into your computer:
Select “Copy,” which is located at the top of the screen. It’s best to import your photos with the memory card; if you connect your camera or phone directly, make sure that it’s fully charged otherwise you may lose the imports and have to try again.
You may be prompted to choose a destination right away, but you can do that later after you’ve imported all of your images. If an image comes up on the screen that you don’t want to import simply “uncheck” the checkbox on the image. Once you’ve selected all the images you want to import, click the Import button (lower-right corner).
The Collections option is also a good organizing feature to use if you want to break down and organize your photos even more specifically. Let’s say you took pictures of your trip to San Francisco. Using the collections feature you can put all photos of the Golden Gate Bridge, Chinatown, or other things/places in one spot. You can also enter keywords on each image.
Remember, all organizing features can be explored in-depth as you become more comfortable with your software. For many Lightroom 6 users, their main focus is to get their photos uploaded to a safe and permanent place.
Editing
Editing photos can be stressful and even a little scary, especially if you make a mistake but have a hard time returning to the original image. One of the unique features of Lightroom is the “non-destructive” editing.
This means that you can upload a photo to Lightroom and the original image remains completely untouched. You can make changes to a thumbnail version of your photo, but you will always have the opportunity to have the original kept on file.
Lightroom has a “cataloging” feature, which means that it stores a record of all the changes you make to your images in a file called “Catalog;” this is separate from your picture files. Storing each change, you make to a picture can help you backtrack or get a better look at which changes you made to the image.
Lightroom 6 is an excellent choice for beginners because while it may not have as many extensive editing features as other software for photography, you can adjust the brightness, contrast, color, sharpness, and other essential and commonly used editing features.
Want to touch up one area, but leave the rest of your image as is? You can edit your photo using the “local” edits feature.
It’s important to note that when you’re ready to edit your images, you will click on the “Develop” option (top right corner of the screen). You can crop your image and play around with the exposure and other editing tools to make your image just the way you want it to look.
As you get used to editing your photos, you might want to create your own presets (you might want to think of this like a filter). Once you create a preset, you can title it, and use it for any of your images.
The best part about editing your photos is that you can play around with the developing tools as much as you want and you never have to worry about losing the original or versions that you have already saved.
Exporting
While having a safe spot for storing and editing photos is important to every photographer, having an easy way to export them is just as important. Whether your emailing photos to family members or submitting them for a photography exhibit, sending full-resolution photos may have limitations depending on your email service.
The exporting feature in Lightroom allows you to send your photos at nearly any size you wish without affecting the quality of the image.
When you’re ready to export your image (and you have chosen “Export”), you might be initially overwhelmed with all of your exporting options in the pull-down menu. Some recommend starting with a “Full-Sized JPEG” and then consider selecting the following.
Choose File Settings, JPEG (image format), slide the quality slider to 85, and Color Space to sRGB.
Next, choose Image Sizing, undo “Resize to Fit” and select “Width and Height.” For a full-size JPEG, enter 2408 pixels for both width and height.
For the purpose of post-processing, set After Export to “Show in Finder” or “Show in Windows Explorer.”
A Final Reminder For Lightroom 6
Although photo editing software can be a little daunting, particularly to beginners, it’s important to remember that when you use software like Lightroom, you can edit your photos as much as you want and make numerous copies without having to worry about the original images that you uploaded.
As a beginner, organizing, basic editing, and exporting are the three features you should become comfortable using before you explore more in-depth editing tutorials.


