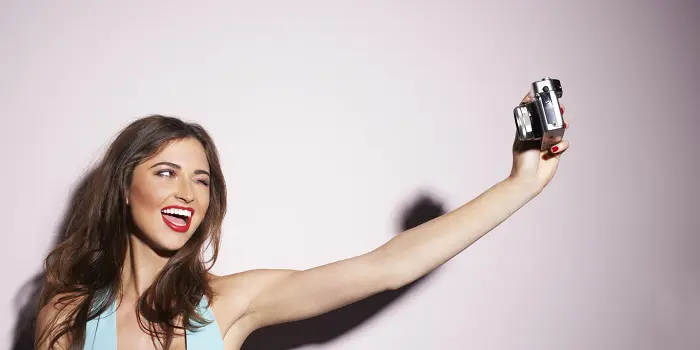
For years, I was skeptical. Could an iPhone *really* capture photos that looked professional? Could I actually ditch my bulky DSLR and rely solely on this tiny device in my pocket? But as the iPhone camera evolved, so did my thinking. I started experimenting, playing with different settings, pushing the limits of what this seemingly simple camera could do. And you know what? I was amazed. You can absolutely take stunning photos with your iPhone – images that rival those shot on traditional cameras – with the right iPhone photography tips.
More than just convenience, shooting on an iPhone unlocks a new world of creative possibilities. That sleek design, always-in-your-pocket accessibility? This means you’re ready to capture spontaneous moments of beauty, interesting compositions, and unique perspectives – the things that truly make a photo special. This, paired with simple iPhone photography tips, allows you to transform the ordinary into extraordinary.
Table of Contents:
- Unlocking the Potential: Your iPhone’s Built-in Camera Features
- Beyond the Basics: Gear to Amplify Your Creative Possibilities
- Smartphone Lenses: Changing Perspectives and Unveiling Tiny Worlds
- Tripods and Grips: Saying “No” to Blurry Shots, Shaky Hands, and Dropped Phones
- Unlocking Night Photography Magic
- Turning Ordinary Flashlights Into Lighting Masterpieces
- Embrace Street Lights and Other Unexpected Urban Canvases
- The Art of Reflection: Doubles, Symmetry, and Unexpected Perspective Shifts
- Silhouettes and Shadows
- Enhancing iPhone Photography in Post Processing
- Going Beyond the Photo: Composition for Impact
- Conclusion
- FAQs about iphone photography tips

Unlocking the Potential: Your iPhone’s Built-in Camera Features
Before we delve into composition and technique, let’s familiarize ourselves with the powerhouse features your iPhone camera already offers. These are the building blocks for taking great shots, the tools that give you more control and allow you to unleash your creativity. Think of these as your secret weapons for taking photographs with iPhone cameras.
Mastering Focus and Exposure: The Foundation of Every Great Shot
You see something beautiful – a fleeting moment, a captivating scene – and you want to capture it. It happens to all of us. But how do you make sure that beauty translates into your photos, that your vision becomes a reality? It all starts with focus and exposure. This dynamic duo determines how sharp your image is, and how much light it lets in. Master these and you’re well on your way to amazing photography with iPhone cameras.
To set your focus, simply tap on the screen where you want the camera to sharpen the details. See that little yellow box that appears? That’s your iPhone letting you know, “Okay, I got it. That’s the area I’m going to make crisp and clear”.
Right next to that focus box is a little sun icon. That, my friends, controls exposure, the amount of light the camera captures. Drag it up for a brighter picture, drag it down for a moodier vibe. Sometimes the standard iPhone photography tips, such as this, are more helpful than advanced options. For those of you that prefer shooting on automatic mode, this is great news because, as the environment changes, your iPhone automatically refocuses and adjusts exposure for each shot. Pretty nifty, huh?
Lock It In Place: Holding Your Settings for that Perfect Composition
Sometimes, though, automatic isn’t enough. Ever had that experience where you want to focus on one specific part of the scene, and adjust the lighting *just so*, but the second you shift the camera a little, everything resets? It happens to all of us, and that’s when the “AE/AF Lock” becomes a total lifesaver.
When shooting, tap the screen where you want the focus and hold for just a couple seconds. A yellow box appears with “AE/AF Lock” – this means your settings are frozen. You’re free to experiment with composition, knowing your desired focus and exposure are set exactly where you want them.
HDR Mode: Expanding the Dynamic Range of your Photos
Next up in our toolkit of essential iPhone photography tips: High Dynamic Range, or HDR, as it’s commonly known. HDR captures a series of photos at different exposure levels, blending them to reveal those often-lost details in the darkest shadows and the brightest highlights. Basically, this expands the range of what your iPhone camera can “see” and bring into your image, helping you create balanced and beautifully detailed photographs.
Ever shoot a photo where the sky looked fantastic, perfectly exposed with fluffy white clouds, but the foreground was completely dark and underexposed? This happens because the camera sometimes struggles to capture both the very bright sky AND the shadowy foreground in perfect balance. Using HDR helps alleviate this struggle because your iPhone actually captures multiple exposures, merging the best of those photos into a single image where ideally both sky AND foreground details are clear and visible.
This simple setting can make all the difference for your photos. While this can make processing the images take slightly longer for your iPhone to capture, in most cases HDR enhances details significantly – especially helpful in high-contrast situations. Turn this on in your settings.

Exploring Portrait Mode: Beyond Traditional Portrait Photography
Portrait mode is more than just about taking pictures of people. While this setting helps you to get that beautiful blurry background (known as “bokeh”) behind a person, mimicking the effects of a high-end DSLR lens, it can be a game changer for food photography, or even macro shots of everyday objects too.
Experiment with portrait mode for captivating detail shots. It is very useful, so remember it is one of the more popular iPhone photography tips to use.
By utilizing these built-in features, you’re laying the foundation for captivating iPhone photography. Experiment, adjust, and find what works best for the story you want to tell. Now, let’s step it up a notch with some additional tools to enhance your iPhone photography tips. These aren’t mandatory, but I’m going to show you just how they can help take your shots to a professional level, without breaking the bank.
Beyond the Basics: Gear to Amplify Your Creative Possibilities
Remember, photography is about the eye behind the lens – not necessarily about fancy equipment. But some well-chosen additions can expand your range and take you out of that comfortable box we all tend to shoot from. And because it is helpful information, I am going to share additional iPhone photography tips.
Smartphone Lenses: Changing Perspectives and Unveiling Tiny Worlds
External lenses for your iPhone are affordable, portable, and a complete game-changer for those looking to explore beyond the limitations of your built-in lenses. From breathtaking wide-angle landscapes, to mesmerizing macro details, to artistic telephoto shots, you can achieve results rivaling expensive professional lens set-ups with the right attachments for your iPhone.
Olloclip and Moment offer a range of high quality lens attachments specifically designed for your iPhone. With a macro lens attached, those small and easily missed details will be completely transformed. Suddenly you’re able to capture intricate patterns on flowers or butterfly wings, minute water droplets, and captivating close-ups that truly unveil the hidden beauty of the world around us.
Tripods and Grips: Saying “No” to Blurry Shots, Shaky Hands, and Dropped Phones
As a photographer, there is a truth we all eventually face. Shaky hands happen. Especially noticeable when shooting in low light, those unintentional tiny movements transfer to your photos. A stable, solid base for your iPhone can be more impactful than you may realize. Whether a travel tripod you toss in your bag, or even using a stack of books on a table – a level, sturdy platform minimizes unwanted movement and unlocks that coveted professional look.
My current go-to is the Peak Design Travel Tripod. Tripods aren’t just about preventing blurriness. I mean, nobody *likes* shaky and blurry pictures. However, I am willing to bet the more you think about it, there are going to be many iPhone photography tips that surprise you. When shooting photos or even time lapses using the tripod, the remote shutter eliminates those tiny vibrations that often result when you physically tap the phone to snap the picture.
Grips and phone cases with built-in grips offer more control, especially those spontaneous one-handed shots where accidental phone drops can quickly end your shoot and potentially your creativity forever.
Unlocking Night Photography Magic
Shooting after sunset opens up a world of creativity, but also presents challenges that many iPhone photographers avoid entirely. You need additional support beyond a steady hand. I have used these exact iPhone photography tips many times over the years. Trust me when I say a little creativity helps take your low-light shots from “oh, that’s interesting” to a completely different “WOW.” category. Let’s dive into a few unconventional hacks that might surprise you.
Turning Ordinary Flashlights Into Lighting Masterpieces
Those readily-available LED flashlights most of us have around the house can add just the right touch of drama, emphasis, or even an unexpected splash of color to your nighttime images. Instead of blasting your scene with the iPhone’s built-in flash (often harsh, unforgiving, and lacking artistry), try using one or more external lights to illuminate specific areas. Play with the angles and the distances between the flashlights and your subjects, then notice how the quality and color of the light transforms as you do so. With practice, those late-night outings can reveal breathtaking iPhone photography you may not have realized were even possible.
Embrace Street Lights and Other Unexpected Urban Canvases
Look beyond your iPhone’s screen and pay attention to the city landscapes surrounding you after the sun sets. The neon signs outside businesses, streetlamps casting elongated beams, reflections from wet pavement or store windows reflecting car headlights…these often-overlooked elements become creative tools in the right hands. They are like brushstrokes for street photographers. Compose your photos in a way that incorporates these light sources for added dimension and impact. Hold completely still and use that external light source to help you take sharper low-light photos, adding a touch of artistic flare.

The Art of Reflection: Doubles, Symmetry, and Unexpected Perspective Shifts
While many photographers are quick to look up when shooting buildings, monuments or even forests, try pointing your phone downwards. Water puddles transform city scenes into symmetrical wonderlands, revealing mirrored cityscapes in abstract, gravity-defying ways. Don’t overlook reflections found in storefront windows, cars, even sunglasses – they add unexpected perspectives that transform otherwise “ordinary” shots into visually-compelling compositions, allowing for compelling street photography, for example.
Silhouettes and Shadows
Who doesn’t love a good shadow? When it comes to capturing stunning and simple photos using our iPhone camera, shadows can be a great tool to work with. Not to mention, shadows also bring intrigue to iPhone photography. As you go about your daily adventures, start paying attention to how the light casts interesting shadows or silhouettes, adding mystery and captivating your viewers, encouraging them to take a second look. It is easily one of the more unique iPhone photography tips I can recommend.
Enhancing iPhone Photography in Post Processing
Although your initial photo is the canvas, editing apps give you a brush, allowing you to paint, adjust and refine. Whether enhancing color, creating moodiness, removing distractions, or emphasizing interesting details, this phase in the photographic process is an essential tool for all photographers – including those who capture moments on an iPhone.
Free Apps With Surprising Power
These days there are free, easy-to-use apps that unlock a professional editing suite directly on your iPhone, without needing years of photo editing experience. Here are a few freebies to try out: TouchRetouch (to eliminate distracting elements or imperfections in a photo) , Afterlight (to manage lighting with tools like Curves, Saturation and Contrast) or even Adobe Lightroom to color grade your photographs or even use preset filters.
The VSCO app (also free to download) has built-in preset filters to completely transform the tone of your image without needing an expert’s eye. There are other popular paid photography apps that give you control like, Pro Camera.
More Powerful (Paid) Options For Advanced Creative Control
Although those free apps give you amazing options to enhance and even transform your photos, sometimes they’re simply not enough for intricate detail work and complete color control. It is definitely not one of those “basic” iPhone photography tips but an investment you will never regret as your abilities develop and you crave deeper control.
Paid photography apps (subscriptions or one-time purchase) often have powerful RAW editing features that unveil hidden details within photos. Remember, the better your original image quality is straight out of camera, the more those powerful tools can bring out details in your image. If you love to experiment, many apps have brush and masking options that allow you to fine-tune selective areas within your photos, giving you even more control. Consider exploring Snapseed, Mextures or even Lens Distortions, all three being incredibly well-respected for advanced image manipulation on your iPhone. These are essential to know because many other advanced iPhone photography tips require using an editing software to refine details.
Additional Apps to Consider
| App | Focus | Link |
|---|---|---|
| Adobe Lightroom | Professional Editing Suite (Paid) | https://apps.apple.com/us/app/adobe-photoshop-lightroom/id878783582 |
| NeuralCam (NightMode) | Low Light Photography (Paid) | https://apps.apple.com/us/app/neuralcam-night-mode-camera/id1474856599 |

Going Beyond the Photo: Composition for Impact
While iPhone photography tips regarding cameras, editing and exposure can transform the technical aspect of taking a great photograph, it’s essential we go a little deeper. What makes a photo *captivating*, memorable, something that people want to stare at for more than a few seconds? It’s the same secret that drives award-winning photography for ages – good composition.
The Grid is Your Friend
One of the first steps for capturing compelling iPhone photographs: master those all-important composition rules. A well-balanced picture naturally draws in the viewer’s eye, helps them feel “at peace” with the photo and makes it far more likely that people spend time really *looking* at the picture and absorbing the details instead of just mindlessly scrolling by on social media feeds. Turn on your grid in settings. This overlay is essential, especially for those that are newer to photography and helps to achieve this balance with more ease.
Leveraging iPhone-Specific Techniques
Many composition techniques I often use when working with a camera easily transition into your iPhone workflow too. Things like leading lines, depth by incorporating elements at varying distances within the scene, as well as shooting through doorways, windows, tree branches and other openings, immediately bring your photos from flat to 3D.
Symmetry and Reflections: Mirroring Reality, Doubling the Beauty
Whether those serene reflections found in puddles after a rain shower, mirrored facades of modern architecture, or even those calming symmetrical close-up patterns often overlooked, there is undeniable impact. Symmetrical scenes hold the power to make viewers feel at peace, revealing a world that appears predictable, almost comforting – despite the unpredictability we actually live with everyday.
Leading Lines: Pulling the Viewer Into the Frame
Straight roads cutting through vast landscapes, train tracks disappearing into the horizon, curving paths disappearing behind ancient forests or cascading waterfalls, even that striking line of where ocean meets sand… leading lines visually draw your viewer’s eye deeper into the frame, inviting them to not only look at the scene you’ve captured, but feel the energy and story within it. Use them to your advantage. One of my personal favorite photography tips that I continue to utilize for almost every client shoot – use those natural lines to enhance your composition.

Unconventional iPhone Photography: Playing With Perspective
Ever seen those photos that feel like the world got flipped on it’s side, where it looks like a building might topple over, the forest appears weightless, gravity almost seems like a mere suggestion instead of a scientific truth? These surreal and often captivating perspectives come from shooting directly upwards (think those rows of trees seemingly bending together to touch in a canopy far above), through openings where part of your lens is actually obscured (think doorways, car windows or tree branches), or those disorienting up-close patterns where the focus is blurred just slightly for a subtle touch of disorientation. By pushing those artistic limits, playing with the rules instead of following them perfectly, your iPhone photos come alive and give your viewer pause, almost inviting them to step into your image for an immersive sensory experience.
I also enjoy sharing photos and quick iPhone photography tips on TikTok. I recently joined and find that community is great for creative exploration.
Another option when it comes to sharing more advanced and even helpful content – make a Google Slides Presentation. For example, there are many photography guides on the web you could check out. This, along with giving helpful photography advice is a helpful way to build credibility in addition to your creative iPhone photography tips.
Conclusion
By using my tested and proven iPhone photography tips, you can achieve professional-level results, even if you don’t consider yourself a skilled photographer. Remember though, more important than the tips themselves is your unique perspective. You will naturally create one-of-a-kind images that nobody else can replicate. Let those fleeting moments, the things that intrigue and inspire you, be your guiding force as you learn more. Play with your settings, don’t be afraid to push creative limits, explore editing tools with an experimental lens, and above all – remember those composition guidelines. And if your heart is really set on professional quality iPhone photography, those lens attachments are affordable, packable and unlock a world of possibilities you may have only dreamt of before.
FAQs about iPhone photography tips
FAQ 1: How to take better pictures with iPhone?
The key to taking better pictures with your iPhone is to master the basics of focus, exposure, and composition. Always make sure your lens is clean. Take advantage of your phone’s built-in features, such as HDR, and practice framing your shots with techniques like the rule of thirds.
FAQ 2: How do I use my iPhone Camera as a professional photographer?
While a professional photographer may require the more in-depth features of a DSLR, there are ways you can mimic those outcomes on an iPhone. For instance, external lens attachments allow you to create more dynamic photographs. Learn and apply techniques from professional photographers when it comes to composition and editing. Remember, it is not just iPhone photography tips, but those universal skills that elevate the professional quality.
FAQ 3: How do I make my iPhone Camera quality better?
iPhone cameras can only do so much on their own. However, they do come with several settings that you can take advantage of. It’s all about figuring out which iPhone photography tips best suit your situation. For example, you can opt to change the photo formatting in your camera settings, play around with different shooting modes, or adjust focus and lighting. Other options include ensuring your software is up-to-date and using an external flash. If you’re shooting in RAW, editing in a professional photography program gives you additional control over quality too.
FAQ 4: How do I take good product photography with my iPhone?
Good product photos require understanding how to showcase what you are photographing in a clear and compelling way. First, you need to set up your lighting and use clean backgrounds. White or black are popular for product images. Next, you will need to carefully compose your shot by positioning the product within the frame. Explore additional tools that make iPhone photography easier, including a small tabletop tripod or LED light panel.